

Getting Started
This guide walks you through setting up the MAS development environment from scratch and starting MAS in development mode.
Choose a Development Tool
The MAS backend and plugin system use Python 3.12, and the desktop app uses Electron. See the technical stack for details.
The plugin system tries to avoid forcing plugin developers to handle frontend configuration. In theory, you only need Python knowledge to develop MAS plugins.
This guide uses VS Code as the development tool. You can also use JetBrains PyCharm or even Spyder if you prefer.
Install Python
MAS needs Python. We currently require Python 3.12. Although the backend may appear to run with Python versions around 3.12, Python 3.13 may have potential compatibility issues, and older versions may prevent some libraries from working. If you plan to develop MAS plugins long-term, use Python 3.12.
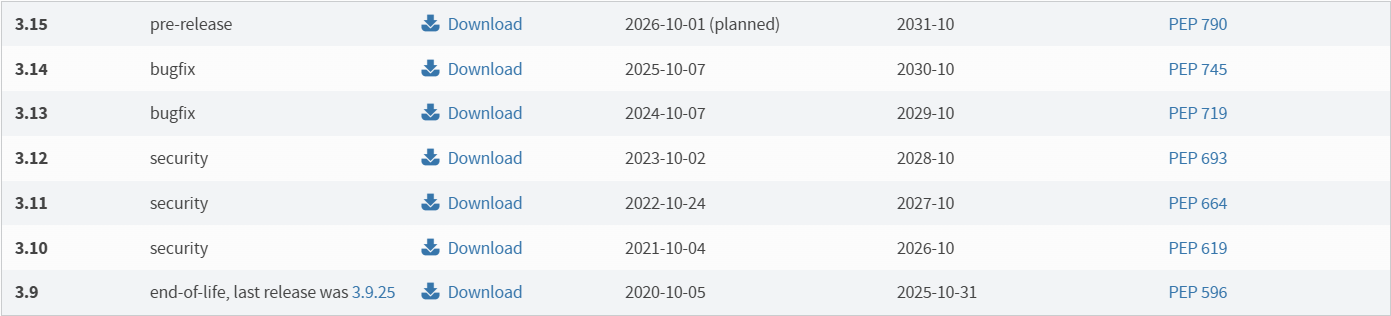
Click Download, then finish installation according to the installer.
If Python is not installed on your computer, select Add to Path to add the Python interpreter to your system environment variables.
After installation, open a command-line tool such as CMD or PowerShell and run:
python --versionIf it shows something like Python 3.12.x, installation succeeded.
Install Node.js
MAS uses Electron 37.0.0 and requires Node 22.16.0 or later.
Go to the Node.js website, choose a suitable version, preferably an LTS version, then download and install it.
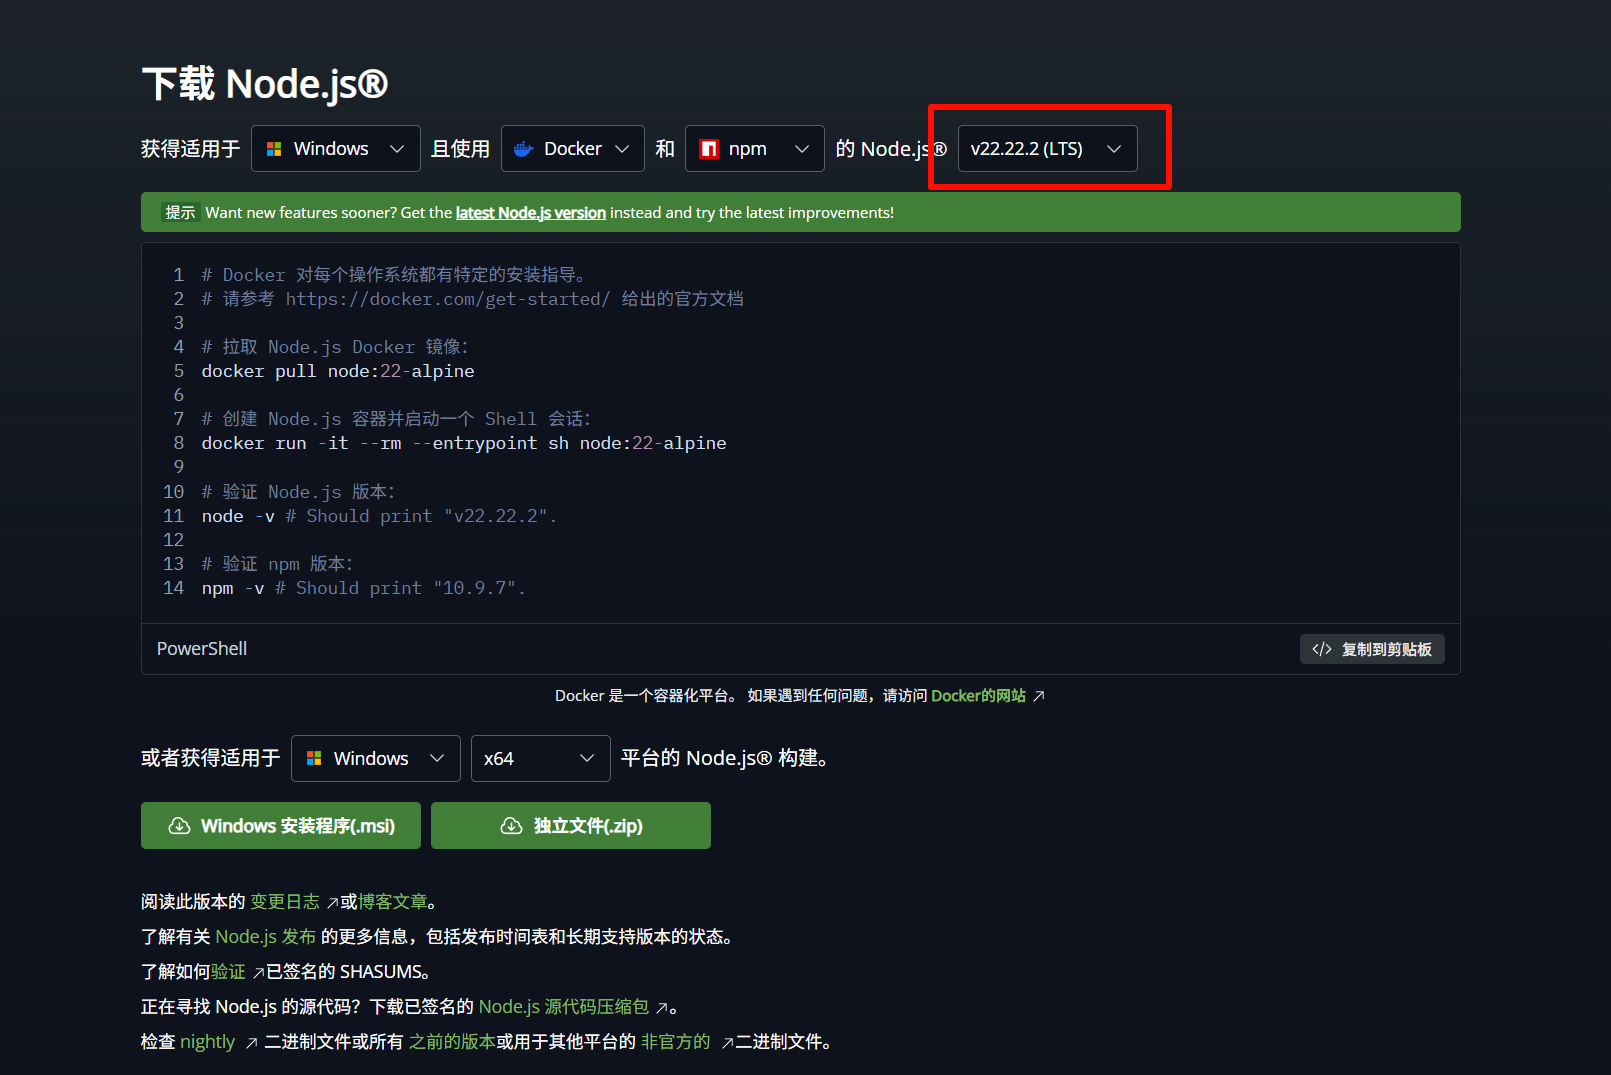
After installation, open CMD or PowerShell and run:
node -vIf it shows something like v22.16.0, installation succeeded.
Install Git (Recommended)
MAS uses Git to clone the project, and we also recommend using Git to manage your plugins.
Go to the Git website, download the correct version for your system, and install the latest version.
If downloading is difficult, you can use the CNPM mirror.
During Git installation, keeping the default options and clicking through is usually fine. After installation, open CMD or PowerShell and run:
git --versionIf it shows something like git version 2.53.0, installation succeeded.
Finally, set your name and email. They will be used by default as the author of plugins you create and will also appear in your commit history:
git config --global user.name "Your Name"
git config --global user.email "you@example.com"
Register a Code Hosting Account
We usually recommend registering a GitHub account. GitHub is a code hosting platform where you can create repositories to store your code.
You can also use domestic alternatives such as Gitee or CNB. Search for relevant tutorials and register by yourself. If registration fails, do not worry; you can still develop locally.
We encourage and support all plugin developers to open source their plugin code. Open source code is easier for the community to recognize, audit, and contribute to.
Clone the MAS Repository
Create a suitable development directory, such as D:/dev, then clone the MAS GitHub repository locally:
git clone https://github.com/AUTO-MAS-Project/AUTO-MAS.gitOr use SSH:
git clone git@github.com:AUTO-MAS-Project/AUTO-MAS.gitWait for cloning to finish.
Note
You may notice AUTO-MAS repositories on CNB, GitCode, and other platforms.
Except for CNB and GitHub, repositories on other platforms are not uploaded by AUTO-MAS Team and are unrelated to the developers.
We are trying to support downloads through CNB, but Git commits there may not be the latest. We still recommend cloning from GitHub.
The project structure is roughly described in the project structure section.
Backend Python Environment
Create a Virtual Environment
In the MAS repository, create a Python virtual environment:
python -m venv .venvActivate the Virtual Environment
Windows (CMD):
.venv\Scripts\activate.batWindows (PowerShell):
.venv\Scripts\Activate.ps1PowerShell Tip
If you encounter a permission error, run:
Set-ExecutionPolicy RemoteSigned -Scope CurrentUserWhen the command line shows:
(.venv) C:\xxxx\AUTO-MAS>the virtual environment is activated.
Install Dependencies
pip install -r requirements.txtIf installation is slow, use a mirror:
# Tsinghua University
https://pypi.tuna.tsinghua.edu.cn/simple
# Alibaba Cloud
https://mirrors.aliyun.com/pypi/simple/
# Tencent Cloud
https://mirrors.cloud.tencent.com/pypi/simple
# Douban
https://pypi.douban.com/simple/
# USTC
https://pypi.mirrors.ustc.edu.cn/simple/
# Huawei Cloud
https://mirrors.huaweicloud.com/repository/pypi/simple
For example:
pip install -r requirements.txt -i https://pypi.tuna.tsinghua.edu.cn/simpleFrontend Node Environment
Enable Yarn (Optional)
MAS recommends Yarn v4 for package management.
cd frontend
corepack enable
Verify installation:
yarn --versionIf the output is a 4.x.x version, currently v4.9.1, installation succeeded.
Install Frontend Dependencies
yarn installDownload issues may occur during this step.
Yarn Downloads Are Slow
Use a registry mirror:
yarn config set registry https://registry.npmmirror.comThen run:
yarn installElectron Download Times Out
Use the domestic Electron mirror. Electron officially supports custom download sources. Set the environment variable first.
CMD:
set ELECTRON_MIRROR=https://npmmirror.com/mirrors/electron/PowerShell:
$env:ELECTRON_MIRROR="https://npmmirror.com/mirrors/electron/"Then run:
yarn installStart MAS
Backend
Activate the virtual environment first:
.venv\Scripts\activate.batRun main.py:
(.venv) C:\xxxx\AUTO-MAS>python main.pyIf you see:
| Main program | Application startup complete.
| Main program | Uvicorn running on http://0.0.0.0:36163 (Press CTRL+C to quit)
the backend started successfully.
Frontend
Enter the frontend directory:
cd frontendRun:
yarn devIf a visual window appears, startup succeeded.
You have now started MAS successfully.
Configure VS Code Debugging and Running
To make it easier to start the backend and frontend later, configure launch.json.
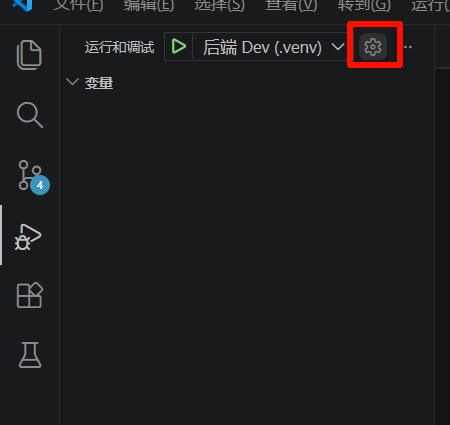
{
  "version": "2.0.0",
  "configurations": [
    {
      "name": "Backend Dev (.venv)",
      "type": "debugpy",
      "request": "launch",
      "program": "${workspaceFolder}/main.py",
      "cwd": "${workspaceFolder}",
      "env": {
        "AUTO_MAS_DEV": "1"
      },
      "python": "${workspaceFolder}\\.venv\\Scripts\\python.exe",
      "console": "integratedTerminal"
    },
    {
      "name": "Frontend dev",
      "type": "node-terminal",
      "request": "launch",
      "command": "npm run dev",
      "cwd": "${workspaceFolder}/frontend"
    }
  ]
}
You can then start and stop MAS more conveniently.
Environment Variables
Environment variables can enable some MAS development-mode behavior.
The environment variable AUTO_MAS_DEV=1 is how the backend detects the development environment. When the backend detects this variable, it uses names and behavior more suitable for development.
The frontend uses the following logic and does not require extra handling:
process.env.NODE_ENV === 'development' ||
(import.meta as any).env?.DEV === true ||
window.location.hostname === 'localhost'
At this point, the basic MAS environment is ready. You can start developing plugins.